Xcode Previews are great. To be able to immediately see how changes in your code are rendered immensely speeds up the development process and makes developing UI elements real fun.
What makes previews even better is that they automatically become interactive when your View has a @State. Consider this code:
struct ColorSwitcher: View {
    @State var color: Color

    var body: some View {
        VStack {
            HStack {
                Button("Red") { color = .red }
                Button("Green") { color = .green }
                Button("Blue") { color = .blue }
            }
            color.frame(width: 200, height: 200)
        }
    }
}

#Preview {
    ColorSwitcher(color: .red)
}
With automatically gives you a preview that is interactive. When you click on the buttons you can see that the colors change:
So far, so easy.
Things become a bit more complicated when your view uses a @Binding instead of a @State. This is really common when you implement custom UI controls:
struct ColorSwitcher: View {
    @Binding var color: Color

    var body: some View {
        VStack {
            HStack {
                Button("Red") { color = .red }
                Button("Green") { color = .green }
                Button("Blue") { color = .blue }
            }
            color.frame(width: 200, height: 200)
        }
    }
}

#Preview {
    ColorSwitcher(color: .constant(.red))
}
Now you need to instantiate a Binding inside the #Preview. The only way to do this without having access to a @State is to use a constant binding. This works but now the interactivity is gone. You can still tap the buttons, but the colors do not change (because the binding is a constant binding that cannot change).
Previously (before iOS17) you help yourself by adding a preview wrapper that can have a @State:
struct ColorSwitcherPreviewWrapper: View {
    @State var color: Color = .red
    var body: some View {
        ColorSwitcher(color: $color)
    }
}

#Preview {
    ColorSwitcherPreviewWrapper()
}
This works, but it not a very elegant solution.
iOS17 to the rescue!
Now we can use the new @Previewable tag to allow a dynamic property to appear inline in a preview.
#Preview {
    @Previewable @State var color = Color.red
    ColorSwitcher(color: $color)
}
I recently worked on an app for a big retailer that made intensive use of remote notifications (aka push notifications). One use case: Whenever you use the app to pay for your shopping you will receive a remote notification when the payment was successful. Tapping on the remote notification would launch the app and show the receipt for the transaction.
As I used a lot of Xcode UITests on this project I was wandering if it is possible to test the remote notification handling in an UITest. It turns out that it is possible. There are two things that need to happen during the test:
1. Trigger a mock remote notification
2. Tap on the remote notification when it is received
Triggering a remote notification is relative easy thanks to the work of the fine folks at noodlework. They build a framework to play around with the Apple Push Notification service (APNs). Using their framework (NWPusher) makes it possible to trigger a remote notification right from a UITest class.
There is one new feature that comes to the XCUITest framework with Xcode 9: Multi App Testing. It is now possible to interact with other apps (and the Springboard) when running a UITest 🎉. So with Xcode 9 we can wait for the remote notification to appear and tap on it. Yay!
So, let’s do it.
Set up a dummy application (if needed)
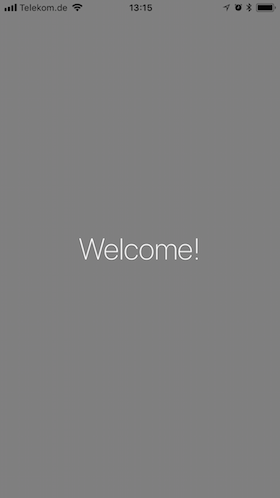
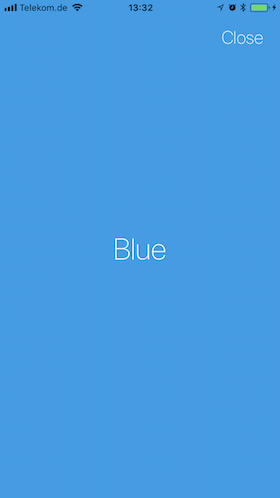
I’m assuming that you already have an app that uses remote notifications. Otherwise just setup a simple app like I did. My app has a main view controller (with a gray background) and three child view controllers with different background colors that are presented modally based on the remote notification that was received:
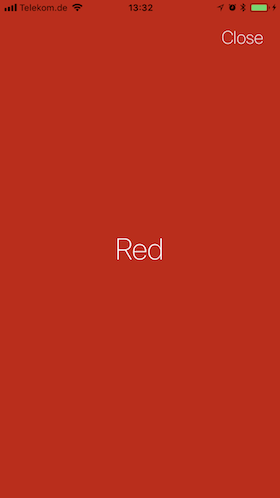
My remote notification’s payload contains a key vcType that can have three values red, blue or green. When you tap on the remote notification the app looks for that key to determine which view controller to present.
This is the remote notification payload that makes the app present a red view controller:
If you are setting up a new app for this remember to activate the PushNotification capabilities in your target.
Trigger a remote notification in a UITest
1. Install NWPusher
Add NWPusher to the UITest target of your app. I use Carthage to do that but you can also use CocoaPods or add their source files directly to your app.
2. Add push notification certificate to your app
To trigger a remote notification you need to add a valid Apple Push Notification service SSL certificate to the UITest target of your app.
There is a detailed description on how to do this in the NWPusher repo, so I keep it short here:
– Create a Development APN Certificate on the Apple developer center (if you do not already have created one).
– Download the certificate and add it to your Keychain
– Export the certificate to a PKCS12 file. Set a password (and remember it ;-))
– Add the p12 file to the UITest target.
Now you are ready to trigger a Remote Notification right from your UITest’s code.
3. Trigger a remote notification from a UITest
I created a helper function to trigger a remote notification because I want to trigger multiple notifications:
func triggerPushNotification(withPayload payload: String, deviceToken: String) {
   let uiTestBundle = Bundle(for: PushNotificationUITests.self)
   guard let url = uiTestBundle.url(forResource: "pusher.p12", withExtension: nil) else { return }

   do {
      let data = try Data(contentsOf: url)
      let pusher = try NWPusher.connect(withPKCS12Data: data, password: "pusher", environment: .auto)
      try pusher.pushPayload(payload, token: deviceToken, identifier: UInt(arc4random_uniform(UInt32(999))))
   } catch {
      print(error)
   }
}
The code loads the certificate file into a Data object, connects to NWPusher’s service and triggers the remote notification.
You might have noticed that this function expects a deviceToken that is needed for the NWPusher service. That is a bit of a problem, because the deviceToken changes everytime you install the app or run the test on a different device.
To get around this I use a dirty hack. I do not really like this but I could not think of another way to make the deviceToken available to the UITest. If you have a better idea, please let me know in the comments!
To make the deviceToken accessible to the UITest I add a launch argument “isRunningUITests” when launching the app from a UITest. The app checks if the launch argument is present and if it is, adds a tiny UILabel to its root view controller and sets the label’s text to the device token. The UITest class then can read the deviceToken from that label. Shudder. Really ugly, I know.
The alternative would be to manually set the deviceToken when running the UITests. Not an option.
So now we can trigger a remote notification from a UITest class. Neat!
One more thing: When you run the app for the first time a system dialog will pop up to ask the user’s permission to send remote notifications. This also happens during a UITest, so we have to dismiss this dialog during the test.
I added a helper function that dismisses the system dialog:
func allowPushNotificationsIfNeeded() {
   addUIInterruptionMonitor(withDescription: "“RemoteNotification” Would Like to Send You Notifications") { (alerts) -> Bool in
      if(alerts.buttons["Allow"].exists){
         alerts.buttons["Allow"].tap()
         return true
      }
      return false
   }
   XCUIApplication().tap()
}
The tap on the XCUIApplication seems a bit strange but you have to interact with the app after setting up the interruption monitor to make it work.
Write the UITest that tests the 3 different remote notifications
Now we can write a UITest that does the following steps:
1. Hold a reference to the app and the springboard
2. Get the deviceToken from the app
3. Close the app
4. Trigger a “red” remote notification
5. Tap on the notification
6. Assert that the red view controller is shown
7. Close the app
8. Trigger a “green” remote notification
9. Tap on the notification
10. Assert that the green view controller is shown
11. Close the app
12. Trigger a “blue” remote notification
13. Tap on the notification
14. Assert that the blue view controller is shown
func testPushNotifications() {
   let app = XCUIApplication()
   app.launchArguments.append("isRunningUITests")
   app.launch()

   // access to the springboard (to be able to tap the notification later) [1]
   let springboard = XCUIApplication(bundleIdentifier: "com.apple.springboard")

   // dismiss the system dialog if it pops up
   allowPushNotificationsIfNeeded()

   // get the current deviceToken from the app [2]
   let deviceToken = app.staticTexts.element(matching: .any, identifier: "tokenLabel").label

   // close app [3]
   XCUIDevice.shared.press(XCUIDevice.Button.home)
   sleep(1)

   // trigger red Push Notification [4]
   triggerPushNotification(
      withPayload: "{\"aps\":{\"alert\":\"Hello Red\"}, \"vcType\":\"red\"}",
      deviceToken: deviceToken)

   // tap on the notification when it is received [5]
   springboard.otherElements["PUSHNOTIFICATION, now, Hello Red"].tap()

   // check if the red view controller is shown [6]
   XCTAssert(app.staticTexts["Red"].exists)

   // dismiss modal view controller and close app [7]
   app.buttons["Close"].tap()
   XCUIDevice.shared.press(XCUIDevice.Button.home)
   sleep(1)

   // trigger green Push Notification [8]
   triggerPushNotification(
      withPayload: "{\"aps\":{\"alert\":\"Hello Green\"}, \"vcType\":\"green\"}",
      deviceToken: deviceToken)

   // tap on the notification when it is received [9]
   springboard.otherElements["PUSHNOTIFICATION, now, Hello Green"].tap()

   // check if the green view controller is shown [10]
   XCTAssert(app.staticTexts["Green"].exists)

   // dismiss modal view controller and close app [11]
   app.buttons["Close"].tap()
   XCUIDevice.shared.press(XCUIDevice.Button.home)
   sleep(1)

   // trigger blue Push Notification [12]
   triggerPushNotification(
      withPayload: "{\"aps\":{\"alert\":\"Hello Blue\"}, \"vcType\":\"blue\"}",
      deviceToken: deviceToken)

   // tap on the notification when it is received [13]
   springboard.otherElements["PUSHNOTIFICATION, now, Hello Blue"].tap()

   // check if the blue view controller is shown [14]
   XCTAssert(app.staticTexts["Blue"].exists)

   // dismiss modal view controller
   app.buttons["Close"].tap()
}
I added sleep statements after closing the to make sure that the app is fully in background mode before triggering the remote notifications.
Now we can run the test and Voila! UITests that test the handling of remote notifications! Just don’t try to run the tests in a Simulator as remote notifications only work on real devices.
You can checkout the demo app including the UITest here. Make sure to add the demo app as your own app to your developer account and to import your own APN development certificate (the p12 file) to the project to make it work.
This surely is trivial to most developers, but I am not exactly a wizard when it comes to bash scripting. So let me just post this as a note to myself.
This is how you remove all files that contain a specific substring in their file name. In this example I use it to remove all the conflict files in a Dropbox folder:
Open your terminal and navigate to the folder that contains the files that should be removed. This folder can also contain subfolders. Files in subfolders will also be removed if they contain the substring “Konflikt”.
As you can see, my system language is German, so Dropbox names all conflicted files with the Keyword “Konflikt”. Just change that to your system language.
Be careful! Once you have removed the files there is no turning back. No “undo” button here!!!
And now for something completely different: After updating my OS to Mountain Lion, one thing was driving me nuts:
I just could not drag any window (Chrome, Finder etc.) from my MacBook Pro’s display to my secondary monitor (which I arranged on top of my MacBook Pro monitor). It just was blocked by the menu bar.
I took me a while to figure it out but apparently you have to show a little persistence: Just keep on dragging! At first the window is stuck below the menu bar but then just as the mouse is about to reach to top of the secondary monitor, the window jumps to the secondary monitor as well.
Adding In-App Purchase items to your Application in iTunesConnect by hand is a boring and time consuming task. When I realized that I’d have to add about 1000 items for my app I really did not want to do that manually. Luckily there is a tool for mass upload of In-App Purchase items. It is a bit hidden though.
When you log in to iTunesConnect and select “Manage your Apps” there is a section in the footer called Application Loader. That’s the tool you’ll need.
Download Application Loader and the Spreadsheet Example. With Application Loader you can select a text file that contains a list of the In-App Purchase items that you want to add to your app. It is a tab separated list that contains all the metadata that you’d normally add manually when adding an item in iTunesConnect. Have a look at the spreadsheet example to see what format the list should have.
To add the mandatory screenshots I found it easiest to put all the screenshots in one folder and name the screenshot according to the product ID. If your item’s product ID is com.yourdomain.product1 than the screenshot must be named com.yourdomain.product1.jpg.
If you have that text file all you have to do is select the file in Application Loader, select the screenshot folder, hit “next” a couple of times and then “deliver”.
Voilá, that’s it! Do not panic if your new In-App Purchase items do not show up in iTunesConnect right away. Sometimes it takes a couple of hours(!) before the show up.
When you use Addthis.com’s share plugin and you are wondering why the email service won’t show up in the share options, here’s what I did wrong:
Apparently the email service needs the “username” parameter to be set. Normally when you generate the addthis code by clicking the button on their site, the username will be a parameter in the URL to the javascript. While I was tempering their code the adjust it to my needs, I somehow lost the username. That made the email service disappear in the addthis layer. As soon as I added the username to the plugin’s setting variable “addthis_config” the email option reappeared.