I recently worked on an app for a big retailer that made intensive use of remote notifications (aka push notifications). One use case: Whenever you use the app to pay for your shopping you will receive a remote notification when the payment was successful. Tapping on the remote notification would launch the app and show the receipt for the transaction.
As I used a lot of Xcode UITests on this project I was wandering if it is possible to test the remote notification handling in an UITest. It turns out that it is possible. There are two things that need to happen during the test:
1. Trigger a mock remote notification
2. Tap on the remote notification when it is received
Triggering a remote notification is relative easy thanks to the work of the fine folks at noodlework. They build a framework to play around with the Apple Push Notification service (APNs). Using their framework (NWPusher) makes it possible to trigger a remote notification right from a UITest class.
There is one new feature that comes to the XCUITest framework with Xcode 9: Multi App Testing. It is now possible to interact with other apps (and the Springboard) when running a UITest 🎉. So with Xcode 9 we can wait for the remote notification to appear and tap on it. Yay!
So, let’s do it.
Set up a dummy application (if needed)
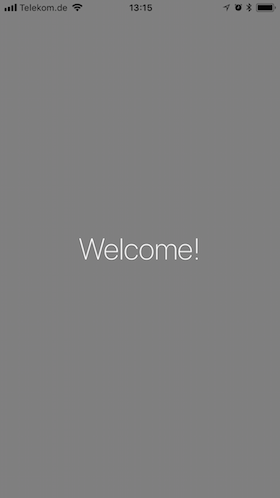
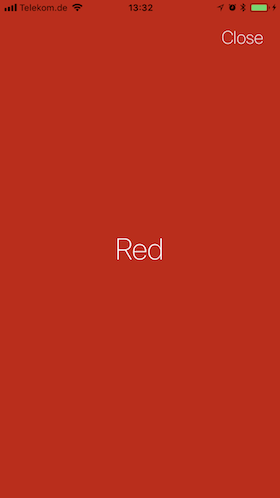
I’m assuming that you already have an app that uses remote notifications. Otherwise just setup a simple app like I did. My app has a main view controller (with a gray background) and three child view controllers with different background colors that are presented modally based on the remote notification that was received:
My remote notification’s payload contains a key vcType that can have three values red, blue or green. When you tap on the remote notification the app looks for that key to determine which view controller to present.
This is the remote notification payload that makes the app present a red view controller:
If you are setting up a new app for this remember to activate the PushNotification capabilities in your target.
Trigger a remote notification in a UITest
1. Install NWPusher
Add NWPusher to the UITest target of your app. I use Carthage to do that but you can also use CocoaPods or add their source files directly to your app.
2. Add push notification certificate to your app
To trigger a remote notification you need to add a valid Apple Push Notification service SSL certificate to the UITest target of your app.
There is a detailed description on how to do this in the NWPusher repo, so I keep it short here:
– Create a Development APN Certificate on the Apple developer center (if you do not already have created one).
– Download the certificate and add it to your Keychain
– Export the certificate to a PKCS12 file. Set a password (and remember it ;-))
– Add the p12 file to the UITest target.
Now you are ready to trigger a Remote Notification right from your UITest’s code.
3. Trigger a remote notification from a UITest
I created a helper function to trigger a remote notification because I want to trigger multiple notifications:
func triggerPushNotification(withPayload payload: String, deviceToken: String) {
   let uiTestBundle = Bundle(for: PushNotificationUITests.self)
   guard let url = uiTestBundle.url(forResource: "pusher.p12", withExtension: nil) else { return }

   do {
      let data = try Data(contentsOf: url)
      let pusher = try NWPusher.connect(withPKCS12Data: data, password: "pusher", environment: .auto)
      try pusher.pushPayload(payload, token: deviceToken, identifier: UInt(arc4random_uniform(UInt32(999))))
   } catch {
      print(error)
   }
}
The code loads the certificate file into a Data object, connects to NWPusher’s service and triggers the remote notification.
You might have noticed that this function expects a deviceToken that is needed for the NWPusher service. That is a bit of a problem, because the deviceToken changes everytime you install the app or run the test on a different device.
To get around this I use a dirty hack. I do not really like this but I could not think of another way to make the deviceToken available to the UITest. If you have a better idea, please let me know in the comments!
To make the deviceToken accessible to the UITest I add a launch argument “isRunningUITests” when launching the app from a UITest. The app checks if the launch argument is present and if it is, adds a tiny UILabel to its root view controller and sets the label’s text to the device token. The UITest class then can read the deviceToken from that label. Shudder. Really ugly, I know.
The alternative would be to manually set the deviceToken when running the UITests. Not an option.
So now we can trigger a remote notification from a UITest class. Neat!
One more thing: When you run the app for the first time a system dialog will pop up to ask the user’s permission to send remote notifications. This also happens during a UITest, so we have to dismiss this dialog during the test.
I added a helper function that dismisses the system dialog:
func allowPushNotificationsIfNeeded() {
   addUIInterruptionMonitor(withDescription: "“RemoteNotification” Would Like to Send You Notifications") { (alerts) -> Bool in
      if(alerts.buttons["Allow"].exists){
         alerts.buttons["Allow"].tap()
         return true
      }
      return false
   }
   XCUIApplication().tap()
}
The tap on the XCUIApplication seems a bit strange but you have to interact with the app after setting up the interruption monitor to make it work.
Write the UITest that tests the 3 different remote notifications
Now we can write a UITest that does the following steps:
1. Hold a reference to the app and the springboard
2. Get the deviceToken from the app
3. Close the app
4. Trigger a “red” remote notification
5. Tap on the notification
6. Assert that the red view controller is shown
7. Close the app
8. Trigger a “green” remote notification
9. Tap on the notification
10. Assert that the green view controller is shown
11. Close the app
12. Trigger a “blue” remote notification
13. Tap on the notification
14. Assert that the blue view controller is shown
func testPushNotifications() {
let app = XCUIApplication()
app.launchArguments.append("isRunningUITests")
app.launch()
// access to the springboard (to be able to tap the notification later) [1]
let springboard = XCUIApplication(bundleIdentifier: "com.apple.springboard")
// dismiss the system dialog if it pops up
allowPushNotificationsIfNeeded()
// get the current deviceToken from the app [2]
let deviceToken = app.staticTexts.element(matching: .any, identifier: "tokenLabel").label
// close app [3]
XCUIDevice.shared.press(XCUIDevice.Button.home)
sleep(1)
// trigger red Push Notification [4]
triggerPushNotification(
withPayload: "{\"aps\":{\"alert\":\"Hello Red\"}, \"vcType\":\"red\"}",
deviceToken: deviceToken)
// tap on the notification when it is received [5]
springboard.otherElements["PUSHNOTIFICATION, now, Hello Red"].tap()
// check if the red view controller is shown [6]
XCTAssert(app.staticTexts["Red"].exists)
// dismiss modal view controller and close app [7]
app.buttons["Close"].tap()
XCUIDevice.shared.press(XCUIDevice.Button.home)
sleep(1)
// trigger green Push Notification [8]
triggerPushNotification(
withPayload: "{\"aps\":{\"alert\":\"Hello Green\"}, \"vcType\":\"green\"}",
deviceToken: deviceToken)
// tap on the notification when it is received [9]
springboard.otherElements["PUSHNOTIFICATION, now, Hello Green"].tap()
// check if the green view controller is shown [10]
XCTAssert(app.staticTexts["Green"].exists)
// dismiss modal view controller and close app [11]
app.buttons["Close"].tap()
XCUIDevice.shared.press(XCUIDevice.Button.home)
sleep(1)
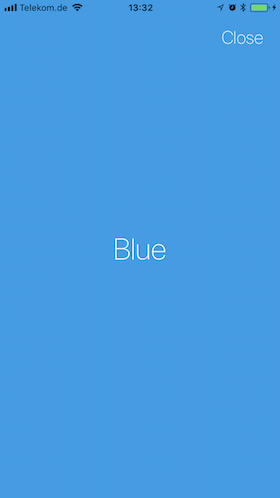
// trigger blue Push Notification [12]
triggerPushNotification(
withPayload: "{\"aps\":{\"alert\":\"Hello Blue\"}, \"vcType\":\"blue\"}",
deviceToken: deviceToken)
// tap on the notification when it is received [13]
springboard.otherElements["PUSHNOTIFICATION, now, Hello Blue"].tap()
// check if the blue view controller is shown [14]
XCTAssert(app.staticTexts["Blue"].exists)
// dismiss modal view controller
app.buttons["Close"].tap()
}
I added sleep statements after closing the to make sure that the app is fully in background mode before triggering the remote notifications.
Now we can run the test and Voila! UITests that test the handling of remote notifications! Just don’t try to run the tests in a Simulator as remote notifications only work on real devices.
You can checkout the demo app including the UITest here. Make sure to add the demo app as your own app to your developer account and to import your own APN development certificate (the p12 file) to the project to make it work.
When your are writing UITests for a multi language app you need access to your Localizable.strings. For example when you need to press a “Save” Button in your test. Because your app is localized the text “Save” is part of your Localizable.strings file.
In your app you set the title of your “Save” Button like this:
When you want to tap that button in a UITest you need to know the title of the button:
XCUIApplication().buttons["Save"].tap()
You could use the quick and dirty approach by just using “Save”. But that will break your test when the button’s title is changed in your Localizable.strings file. And it feels dirty, too 😉
The right way to do this is to retrieve the button title from your Localizable.strings file. To make that work you have to do two things:
1. Add your Localizable.strings file to your UITest target
2. Access the file via the UITest bundle (I use a little helper method for that):
You can use any class from your UITests to access the UITest bundle. When you are not explicitly asking to use the UITest bundle when initializing the NSLocalizedString the default value Bundle.main will be used. Using Bundle.main does not work when running UITests because it gives you the bundle of the UITest Runner App instead of the UITest bundle.
Voilà! You can now use your localized strings in your UITests:
A simple scenario: You are writing a UITest that should check if a UISwitch is switched on.
In a UnitTest you would simply do this:
XCTAssert(yourSwitch.isOn)
When you are running a UITest you cannot do that, because during a running UITest you cannot access the UISwitch directly. Xcode only gives you access to your app’s UI elements via the XCUIElement class. That class is used for all accessible UI elements so it does not have a isOn property like UISwitch has.
So how do you test that the UISwitch is on?
It’s actually pretty easy, but not really obvious. XCUIElement conforms to XCUIElementAttributes which gives you access to a value property of type Any?
So, as value can literally be Any(thing) I tried to cast it to a Bool, because isOn also is a Bool, right?
Not working! Turns out that when you access a UISwitch in your UITest its value property is of type NSTaggedPointerString. Which is a subclass of NSString and can be cast to String (when you are using Swift). So the BoolisOn value has been mapped to a “0” or “1” String.
To test if the first UISwitch in your current view has been switched on, you can do this in a UITest:
let firstSwitch = app.switches.element(boundBy: 0)
XCTAssertEqual(firstSwitch.value as! String, "1")
If you want to access your UISwitch via the accessibility identifier you can do it like this:
Now for something a bit off-topic. As a side project I handle a friend’s company’s website. He asked me to add a button that links to his facebook page and another button that opens the review form for his company’s google page.
Easy peasy. I made two images and embedded them in a link element:
As expected everything worked as expected. Not exactly rocket science.
Until I looked at the webpage in Mobile Safari. The two buttons were not showing up there. They were showing in Chrome for iOS but in Mobile Safari: no Facebook button, no Google button!
As it turned out the image filenames were the problem. Naming them “btn-facebook.png” and “btn-google.png” was triggering my Mobile Safari’s content blocker app!
The solution was really simple. Just renaming the image filenames did the trick:
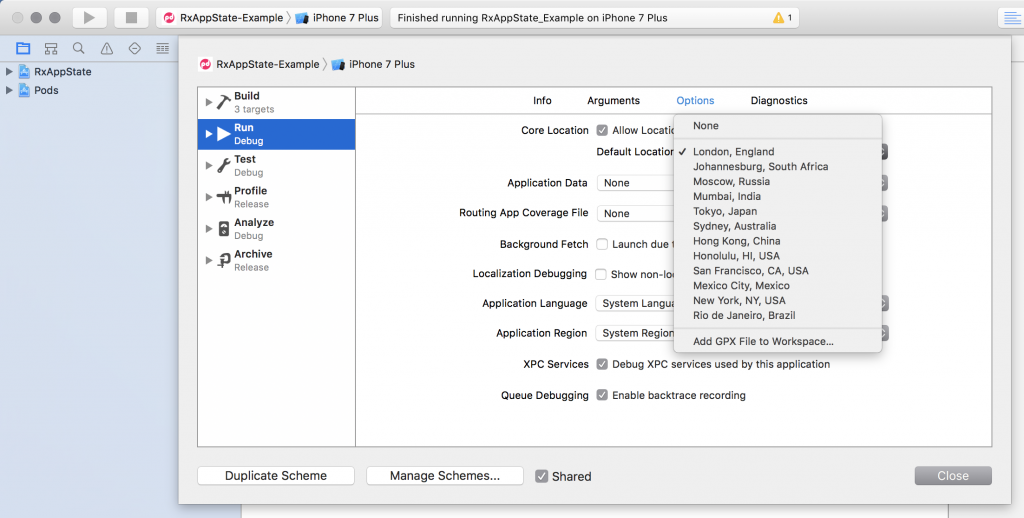
In an older blog post I described how to simulate a custom location in the Simulator by using a GPX file. During my current project I have to use simulated locations a lot. But every time I ran my app in the simulator Xcode deactivated the location simulation. So I had to manually select it again with every start of the app. Really annoying.
As it turns out there is way to permanently enable location simulation in the Simulator. It’s just a bit hidden. To always enable location simulation open Edit Scheme for the scheme you are running and then under Run > Options select one of the available locations as Default Location because otherwise the default is None and no location is simulated.
Voilá, once you select a default location for your scheme the Simulator keeps simulating the location everytime you start it.
Who doesn’t love the “Swipe Back” gesture to navigate back to the previous view controller? I rarely use the back button in the left upper corner of the screen anymore. Especially when you are holding your phone in one hand it is much more easy to just swipe back.
The best thing is that as a developer you don’t have to do anything to enable this swipe back functionality as it already part of UINavigationController.
On initialization UINavigationController installs a UIScreenEdgePanGestureRecognizer on its view to handle the interactive pop gesture (aka “Swipe Back” gesture). You can access the gesture recognizer via the interactivePopGestureRecognizer property.
Now, when you decide to replace the default back button with your own custom back button you will see that the “Swipe Back” Gesture is not working anymore. Apparently the UIScreenEdgePanGestureRecognizer’s delegate only allows the gesture to be recognized when it sees that the default back button is being used. Bummer!
To make the “Swipe Back” work again you have to bypass the delegate that disables the gesture. If found some suggestions that would simply set the delegate to nil. This seems to work at first. But when you start playing around with your app after doing that you will eventually see that the app freezes and does not recognize ANY touches anymore. This happens when you swipe back while the navigation controller is pushing a view controller. Not good!
So you have to set the delegate yourself and implement gestureRecognizerShouldBegin(_:) to disable the gesture whenever the navigation controller is pushing a view controller.
The easiest way to do this is to subclass UINavigationController:
To block the “Swipe Back” gesture there is a boolean property isPushingViewController that is true when the navigation controller is pushing a view controller. [// 1]
Setting the property to true is easy. We simply override pushViewController(_:animated:) and set isPushingViewController to true [// 2]
To be able to set it back to false when the view controller has been pushed we have to know when the push is completed. Luckily there is a UINavigationControllerDelegate method that we can use. So we set our UINavigationController subclass’ delegate to self [// 3] and implement navigationController(_:didShowViewController:animated:) to set isPushingViewController back to false [// 4]
Now all that is left is to also set the interactivePopGestureRecognizer‘s delegate to self [// 5] and to only allow the gesture when isPushingViewController is false. And while we are at it we also make sure that the swipe back makes sense. In other words we check if the navigation controller has more than one view controller on his stack. Otherwise we ignore the gesture. [// 6]
Yay, “Swipe Back” is back!
But wait a minute. What happens when someone is using this UINavigationController subclass and needs to set the delegate themselves:
let navigationController = InteractivePopNavigationController()
navigationController.delegate = self
This won’t work, because we are overwriting the delegate in our subclass’ viewDidLoad method.
To make this work, we need to keep a reference to the delegate before overwriting it and forward all delegate method calls to it:
// 1: We use the didSet property observer on the delegate property. Whenever the delegate is being set we check if our subclass itself is the delegate (we don’t do anything so the subclass will be set as its own delegate). If the delegate is of any other class we do not set it as delegate but keep a reference to it.
// 2: We implement the UINavigationControllerDelegate method that we use to see when the pushing is completing. In this method we set isPushingViewController back to false. We also forward the call to our external delegate.
Unfortunately we have to forward ALL methods that are defined in UINavigationControllerDelegate to out external delegate to make the external delegate fully functional. This is not an ideal solution. When Apple decides to add methods to UINavigationControllerDelegate in the future they will have to added here. Or they won’t be called when setting the delegate manually. In Objective-C you could use the NSInvocation API to handle this, but that API is not available in Swift. I have not found a way to forward all delegate methods to the external delegate in Swift. I you know a way to do this, please leave a comment!
And so, with a little bit of work, we can use the Interactive Pop Gesture (aka “Swipe Back”) even when we are not using the system default back button.
For my current project I use BuddyBuild for Continuous Integration and Delivery which work remarkably well. Until suddenly the builds started to fail in spite of all unit tests being green and everything building without problems locally on my machine.
It took me a while to fix the problem and I am still not 100% sure what the problem was but here is what I did. Normally I would not write a post about stuff I don’t fully understand, but because I could not find anything helpful on Google or StackOverflow about this problem I decided to write a post anyway. Maybe it can point someone with a similar problem into the right direction.
So here is what I did:
Looking at BuddyBuild’s logs I found the error message that was causing the build to fail:
Cannot allocate unsized type
%partial-apply.context = alloca %swift.opaque, align 8
Invalid bitcast
%3 = bitcast %swift.refcounted* %1 to %swift.opaque, !dbg !1790
LLVM ERROR: Broken function found, compilation aborted!
Because this error was not occurring when I built the project locally on my machine I had to find out what the difference was when BuddyBuild was building the project.
As it turned out the Swift compiler was only crashing when building the project with the Release Configuration.
So I could reproduce the crash in Xcode when I build the project with the Release configuration. So far so good. But the problem was, that the error message that Xcode provided when the compiler chrashed was a lot less helpful than the error message provided by BuddyBuild’s log. It basically just tells you that it crashed without telling you where and why. Not good enough to find the problem and fix it.
I was able to get the above error message on my machine so I could start to find out what the problem was.
So I knew which class was causing the problem but I still had to find what was making the compiler crash. I wish I could tell you a really elegant and clever way how I found the problem but to be honest I had to play the old “comment out all the new stuff and then bring it back line by line until the compiler breaks” game.
So I finally found the code snippet that was the cause of the compiler crash:
Apparently using flatMap and directly passing a function as parameter was a bit too much for the LLVM compiler in this case. Which is strange because I do exactly the same in many other parts of the project without any problems. But when I switched to using a closure in this case the compiler crash was gone and everything was building again.
As I already wrote at the beginning of this post I don’t really know what caused the problem. I just managed to fix it somehow. So if any of you has an idea what made the compiler crash I would really appreciate your explanation in the comments.
Auto Layout and UIScrollView seem to be a popular, but sometimes problematic couple. So here is another post about this topic. This time we will take a couple of subviews, add them to a UIScrollView and make everything work by programmatically adding layout constraints.
Because I am a lazy guy, we will use SnapKit (a.k.a. TheFrameworkFormerlyKnownAsMasonry) for the Auto Layout stuff. And because I get bored easily and I have already written a post about a vertical UIScrollView with Auto Layout, we’ll do a horizontal UIScrollView this time. Yay!
So, let’s take 4 empty UIViews and give them each a different background color, so that we can see the scrolling. To make things simple we make each subview the same size as the scrollview (so each subview covers the whole visible area).
Here is the code, you’ll find some explanations below it:
import UIKit
import SnapKit

class ViewController: UIViewController {

    let scrollView = UIScrollView()
    let subViews = [UIView(), UIView(), UIView(), UIView()]
    let colors = [UIColor.greenColor(), UIColor.blueColor(), UIColor.redColor(), UIColor.orangeColor()]

    override func viewDidLoad() {
        super.viewDidLoad()

        // 1
        view.addSubview(scrollView)
        scrollView.snp_makeConstraints { (make) in
            make.edges.equalTo(view)
        }

        // 2
        subViews.enumerate().forEach { index, subview in
            subview.backgroundColor = colors[index]
            // 3
            scrollView.addSubview(subview)
            subview.snp_makeConstraints(closure: { (make) in
                // 4
                make.top.equalTo(0)
                make.size.equalTo(scrollView)
                switch index {
                // 5
                case 0:
                    make.left.equalTo(0)
                // 6
                case subViews.count - 1:
                    make.left.equalTo(subViews[index - 1].snp_right)
                    make.right.equalTo(0)
                // 7
                default:
                    make.left.equalTo(subViews[index - 1].snp_right)
                }
            })
        }
    }
}
First we add the UIScrollView to the UIViewController and set its size to the size of the UIViewController’s view. // 1
We iterate over the subviews // 2, add them to the UIScrollView // 3 and add the Auto Layout constraints following this 4 simple rules:
1. All subviews have a top constraint of 0 and a size constraint that is equal to the scroll view. // 4
2. The first subview (in other words the leftmost subview) has a left constraint of 0 // 5
3. The last subview (the rightmost subview) has a right constraint of 0 // 5
4. All other subviews have a left constraint to the right of the previous subview // 6
And that’s all. When you run this code you can rotate the device to see that the subview sizes and the UIScrollView’s contentSize are adjusted automatically. If you don’t want the UIViews to be resized you just have to give them a static size.
This example also works for a vertical UIScrollView. Just connect the top and bottom constraints of the subviews instead of the left and right constraints. See the blog post I mentioned above for more details.
So you have developed this nice Share Extension to share images. Everything works fine when you select “share” in the Photos App: Your extension is visible and you can use it to share photos from your phone’s photo library.
But then you try to share images from a webpage in Mobile Safari. You press the Share Icon and … your Share Extension does not show up 🙁
What went wrong?
The solution to this problem lies in your Share Extension’s plist file. There you define what types of files your Share Extension can share. Because in your case the Share Extension only accepts image files this should be fine:
Xcode has a neat built in feature that let’s you simulate a (GPS) location in the iOS Simulator. To switch it on you just need to run your app in the Simulator and then click on the location arrow on top of the debug area. Xcode offers a handful of default locations from Moscow to Honolulu that you can use if you just need any location.
Cool!
But sometimes you need to simulate a certain location that is not part of that default set. For example, let’s say you are developing an app that shows all the cool bars in your hometown. Then being able to simulate the location “Honolulu” won’t be of much use to you (unless your hometown in Honolulu).
Luckily Xcode offers the possibility to add a GPX file to your project that defines the location you would like to simulate. GPX is a XML Format for GPS data. It has a large set of datatypes but to simulate a location we only need the wpt (waypoint) datatype:
To add your custom location to the Simulator you have to add a GPX file to your project. Xcode offers this file type in its New File dialog (File -> New -> File… -> Resources -> GPX File) but it is just a plain XML file so you can create it somewhere else and just add it to your project (just make sure it has a “.gpx” file ending).
So to simulate the location add the following GPX file to your project:
Now if you run your app in the Simulator and click on the location arrow on top of the debug area, you will find your custom location on top of the default locations (Xcode displays the file name of your GPX file as the name of your custom location). Select it and the Simulator pretends to be at that location.
Very cool!
But it gets better! What if a static location is still not enough for you? Say, you want to add a feature to your “Best Bars in my Hometown”-App that allows the user to track his way home after his visit to the bar (So he can see the next day how he got home in case he can’t remember…). To test that feature you would have to make the Simulator pretend to be moving from one location to another.
This is where a second GPX datatype comes into play: the time data type. When you add a time element to a waypoint element and you have multiple waypoint elements Xcode simulates a movement between those waypoints:
When you select this GPX file from the list of locations Xcode starts to simulate a movement from the first waypoint to the second waypoint and then to the third.
The speed of this movement is determined by the value of the time elements. The absolute time does not matter. Xcode only uses the time difference between the waypoints to calculate a speed. So in my example it takes the Simulator 1 minute to “move” from the first waypoint to the second waypoint and then another minute before it reaches the third waypoint.